Pages

Showing posts with label Alcohol Inks. Show all posts

Monday, 3 December 2012

Mixed Media Canvas

8 1/2'' x 11'' canvas

6" x 6" canvas
I am really into this Mixed Media Canvas Art lately. I love having 'no rules' to play by and use my fingers as my paint brushes. Paints, mediums, sprays, masks, stamps and markers all lay in a 2 foot space in front of me despite the 5' x 3' table I am working on!
For these particular canvases I had been wanting to do something special with the flowers I had made in a class at Shabby Shutters with Michelle. Someday she will get her own blog up and you can start to see all the beautiful creations she makes...but for now, I'll sneak some of her flowers in my art!
For both canvases I started by Gesso'ing my canvas and going crazy with tans and pink paints. Tissue papers and stamped words are scattered through out the canvases in no particular order. Sew Stampers are PERFECT to use on this type of art! Left over rub-ons, stickers are also perfect as well as scrap paper! A Sharpie marker fills in some doodles and a word or two. The vases were cut from scrap paper and glued on and then inked and doodled upon! Alcohol Inks, Stickles, Perfect Pearls sometimes make an appearance and Glossy Accents...always lots of Glossy Accents!
The star of the show though.....my flowers!!! Thanks Michelley!
Don't you think they fit perfectly into my vase?  ;)

Have a happy craftin' day!

Thursday, 23 August 2012

All around the world

How cool is this little globe?
I almost forgot how fun it was playing with Alcohol Inks. I was truly inspired though when Sherry presented me with some very cool Tim Holtz Sizzix Dies for my birthday. I could so 'see' Alcohol Ink to separate the "land" parts from the "ocean" parts. Needless to say, as soon as I got home I put my theory to the test. This, my friends, would be the awesome result. How cool is that??

Once my card classes for this session are over, I will be sure to post the pictures and the DIY instructions so that YOU can try this very cool idea. Until then...happy crafting!

Friday, 20 January 2012

Last nights creation

I don't even know where the inspiration for this card came from! I find it is a mish-mash of lots of little elements and part of me likes it and part of me doesn't.
The card base is a basic piece of purple cardstock. Patterned paper is something I hauled out of my scraps of paper. The purple piece of paper underneath the bear is actually an alcohol inked piece of glossy cardstock that ended up in the trash pile because I had 'screwed up' the stamped image on it. Nobody would ever know the wiser that there is a stamped image under the bear...(except I did tell you, so now you DO know!)
The little bear is a stamp that I purchased some time ago but I think he is just adorable. I stamped him out on some 'simply smooth' white cardstock (perfect card stock for using Copics on!). I colored the little bugger with my Copic Markers and then put a little 'flock' on his belly. I just wanted to make him look soft and cuddly.
I used my trusty little exacto knife and slit above the heart and then inserted a special little message.

A FREE HUG COUPON! How cute is that? This was another stamp I found in my stash and cut it out and adhered it to another piece of card stock to make it a little more sturdier.
The sentiment is a simple "I miss you" using the "V" cut out on the end to give it a little more 'wow'.

I am loving these new twine packs I got the other night at SHABBY SHUTTERS while teaching my class and so therefore had to add the twine to this card as well.

Naturally, I had to add my doodles to the end of the card...just to give it that Darly touch!

There you have it. Not sure how I feel about it but I figure if I look at it long enough I will learn to like it and then you never know...it just may go in the mailbox towards you!

Happy Crafting where ever you are!

Thursday, 5 January 2012

Germany bound

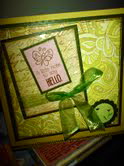
Sometimes the mail brings a nice surprise. Yesterdays mail was one of those days. The people that we actually bought the house from had sent us a Christmas card. It was a little late getting here and the fact that I could not understand a word on the front of the card (they are German) made no difference what so ever. I thought it was a really nice gesture and immediately got to my craft table to see what I could make to send back to them.
I assumed that they liked yellow as all the curtains in the house were yellow. Many artificial greenery surrounded the interior of the house so I took it upon myself to assume they also liked green. Thus the inspiration for a yellow and green card. A very simple yet elegant card...or so I think.

Tuesday, 3 January 2012

Ink Shakes anyone?

What do you get when you cross Alcohol Inks and a Straw? An ink shake?? ( I know, stick to the crafts not the jokes eh?) These little creations are unique in themselves and no two creations will EVER be the same. They are messy little buggers to play with, but with a craft mat underneath it sure helps keep the mess somewhat in order. I have also discovered that the mess on the craft mat afterwards ends up being another creation in itself. All one has to do is add Alcohol Ink Remover to the mat and "swoosh" a glossy piece of card stock (face side down) thru the Inks and Remover. I'm getting ahead of myself though....
This card is simply "blown ink" :) All you need is a piece of glossy card stock, Alcohol Inks of different colors and a straw. Only add one or two dots of Alcohol Ink at a time (it dries extremely fast!) and then blow thru the straw to create different shapes. I have tried long straws and also cut some into very short straws just to see if it would create different shapes. The shorter the straw the more powerful the "spread out" tends to me...or that is what I think.
Once I was satisfied with the amount of colors and the distribution on the card then I simply picked out my other card stock colors and created a simple card. After all, the Alcohol Inks are the star. Don't you think?